
List Anatomy
On this page
In this lesson, you will learn:
- The parts of a ServiceNow list
- How to sort, page through, and preview records
- What the list menus can do
1 Lists are everywhere
A list shows many records from one table, in rows and columns, like a spreadsheet. You’ll use lists every single day as an admin. 📋
Remember: one row is one record, and one column is one field (Lesson 1.1).
2 The parts of a list
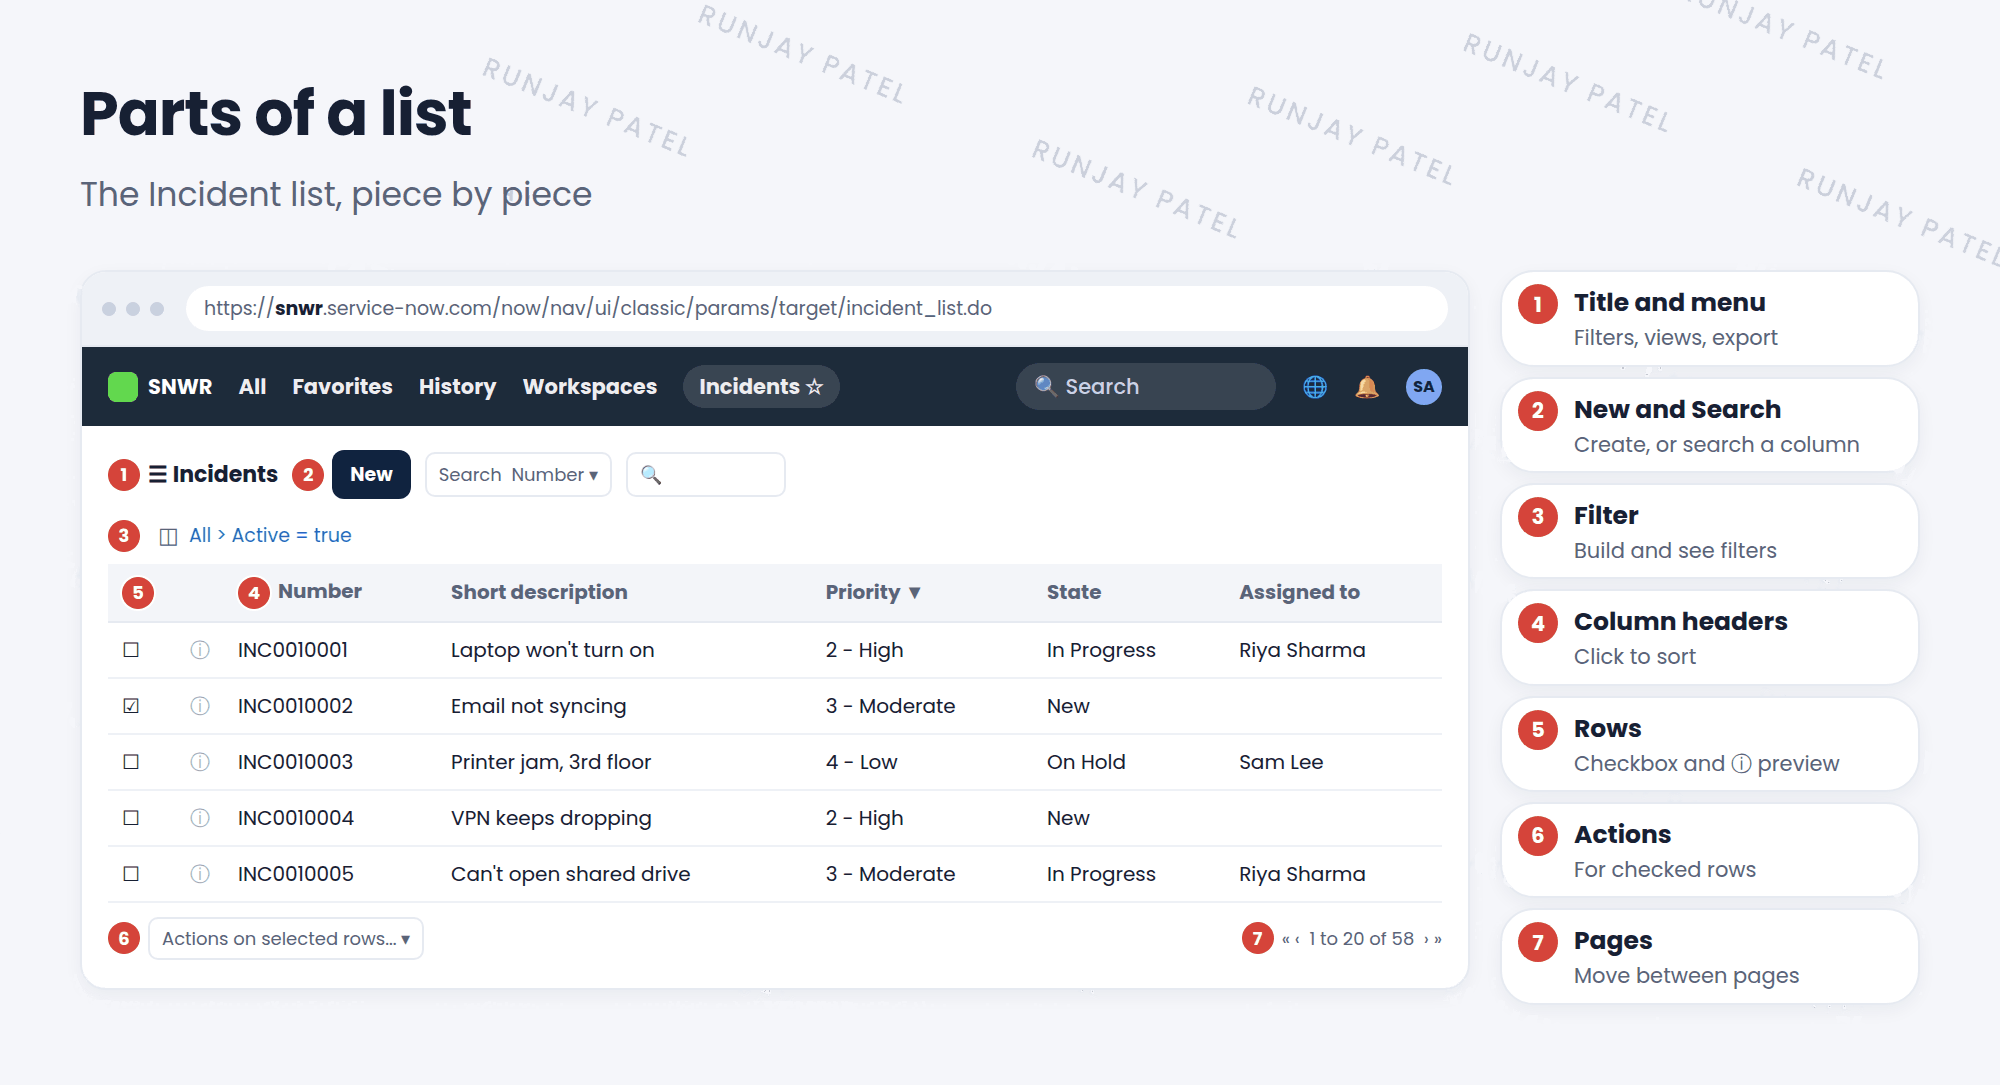
| # | Part | What it does |
|---|---|---|
| 1 | List title and menu | Shows the table name. Its ☰ menu has options like filters, views, and export |
| 2 | New and Search | Create a new record, or search one column |
| 3 | Filter and breadcrumbs | Build a filter and see which filter is on (Lessons 11.2 and 11.3) |
| 4 | Column headers | Click to sort. Right-click for more options |
| 5 | Rows | One record each. Checkbox to select, ⓘ icon to preview |
| 6 | Actions on selected rows | Do something to all checked records at once |
| 7 | Page controls | Move between pages of records |
3 Sorting
- Click a column header once to sort A to Z (or smallest first).
- Click it again to sort Z to A (or biggest first).
- A small arrow shows which column is sorted and in which direction.
💡 Good to know: Right-click a column header to see more options, like Group By. Grouping puts records into groups, for example all incidents grouped by State.
4 Previewing a record
Click the ⓘ icon at the start of a row. A small preview opens, so you can check a record without leaving the list. Click the record’s number to open the full form.
5 Pages
Big lists are split into pages. At the bottom, you’ll see something like 1 to 20 of 58. Use the arrows to move between pages.
📝 Note: You can change how many rows show per page from the list’s ☰ menu (Show > 20, 50, or 100 rows). Very big pages load more slowly.
⭐ Remember: The count, like “of 58”, tells you how many records match the current filter, not the whole table.
6 Let’s try it: explore a list
- Open Incident > All.
- Find all 7 parts from the figure.
- Click the Priority header to sort. Click again to reverse it.
- Right-click the State header and choose Group By State. Then remove the grouping the same way.
- Click the ⓘ icon on any row to preview it.
- How many incidents are in the list? Look at the page controls.
7 Quick recap
- A list shows many records from one table
- Parts: title and menu, New and Search, filter, column headers, rows, actions, and page controls
- Click headers to sort. Right-click for Group By
- The ⓘ icon previews a record
- The count shows records that match the current filter
8 Check yourself
Think of your answer first. Then tap to check.
1 How do you sort a list by Priority? Show answer
Click the Priority column header.
2 How can you look at a record without leaving the list? Show answer
Click the ⓘ preview icon at the start of the row.
3 You want to delete 5 test records at once. Which part of the list helps? Show answer
Check their boxes, then use the actions menu for selected rows.
Nice work! You finished this lesson. 🎉
Was this lesson helpful?
Please log in to share lesson feedback.
Have a question or doubt?
Ask here and get help from instructors and fellow learners.
Only logged-in learners can post.