
Form Designer
On this page
In this lesson, you will learn:
- What Form Designer is and how it’s different from Form Layout
- The three parts of the Form Designer screen
- How to drag fields, add sections, and save
1 Drag and drop
Form Layout (Lesson 14.1) uses lists and arrows. Form Designer does the same job with drag and drop. You see the form as it will look, and move things around with your mouse. 🖱️
| Form Layout | Form Designer | |
|---|---|---|
| Style | Two lists and arrows | Drag and drop on a picture of the form |
| Best for | Quick changes | Seeing the layout as you build it |
| Result | The same. Both change the same form layout | |
2 The Form Designer screen
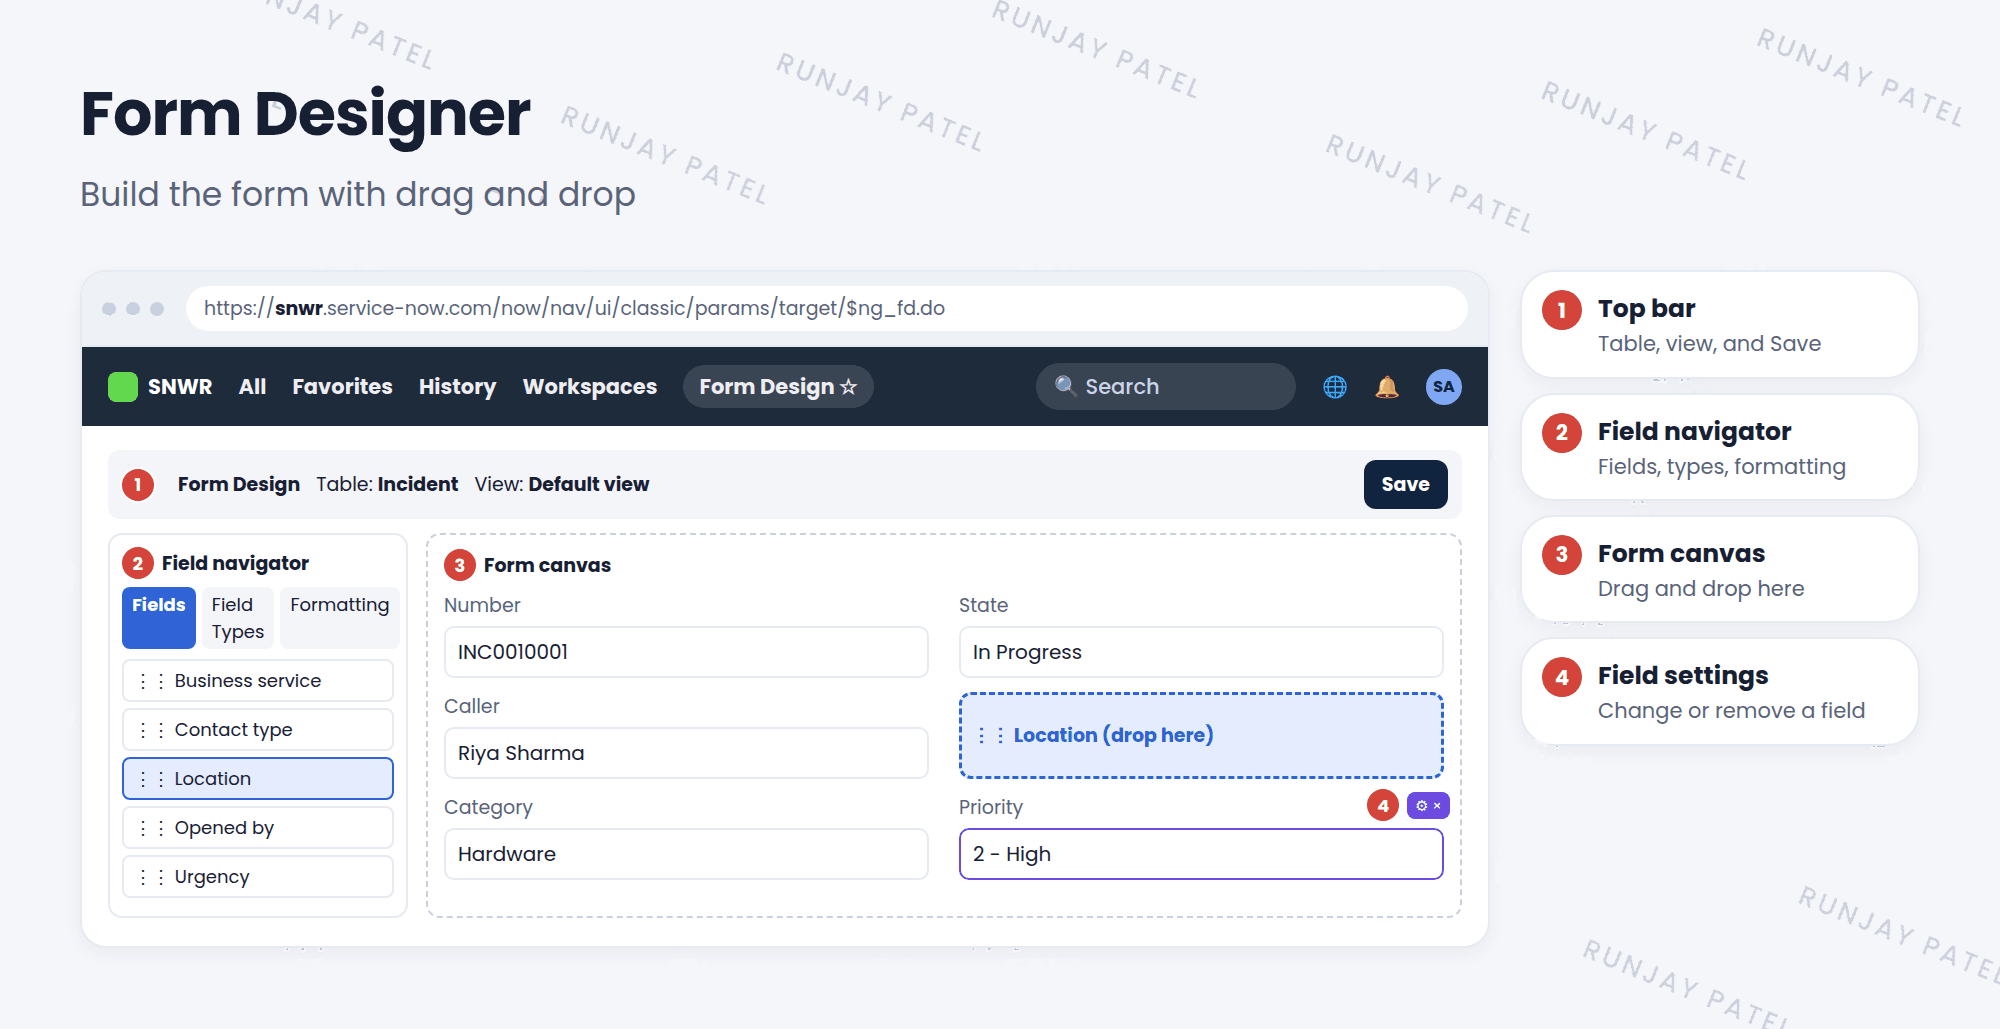
| # | Part | What it does |
|---|---|---|
| 1 | Top bar | Shows the table and view. Has the Save button |
| 2 | Field navigator | Lists fields, field types, and formatting items like sections |
| 3 | Form canvas | A live picture of the form. Drop things here |
| 4 | Field settings | Click a field on the canvas to change or remove it |
3 Using Form Designer
- Open any incident. Choose ☰ > Configure > Form Design.
- In the field navigator, find a field under the Fields tab.
- Drag it onto the canvas, to the spot you want.
- To remove a field, hover over it on the canvas and click the ×.
- To add a section, drag Section from the Formatting tab onto the canvas and name it.
- Click Save. ✅
💡 Good to know: The Field Types tab lets you drag a brand-new field onto the form. Form Designer creates the field in the table for you.
⚠️ Heads up: Nothing is saved until you click Save. If you close the tab first, your changes are lost.
⭐ Remember: Form Layout and Form Designer are two doors into the same room. Use whichever you like.
4 Let’s try it: design a form
- Open any incident and choose ☰ > Configure > Form Design.
- Drag the Contact type field onto the form, below Caller.
- Drag a new Section from the Formatting tab to the bottom. Name it SNWR Extra Info.
- Click Save, then look at the incident form. Do you see the changes?
- Go back and remove what you added. Save again.
5 Quick recap
- Form Designer changes forms with drag and drop
- Open it with Configure > Form Design
- Parts: top bar, field navigator, form canvas, and field settings
- It can add fields, sections, and formatting items
- Always click Save
6 Check yourself
Think of your answer first. Then tap to check.
1 What’s the main difference between Form Layout and Form Designer? Show answer
Form Designer uses drag and drop on a picture of the form. Form Layout uses two lists and arrows. Both change the same layout.
2 Where in Form Designer do you find sections to drag onto the form? Show answer
In the Formatting tab of the field navigator.
3 You made changes and closed the tab. Are they saved? Show answer
No. You must click Save first.
Nice work! You finished this lesson. 🎉
Was this lesson helpful?
Please log in to share lesson feedback.
Have a question or doubt?
Ask here and get help from instructors and fellow learners.
Only logged-in learners can post.