
Personalizing Lists
On this page
In this lesson, you will learn:
- How to choose which columns you see in a list
- Other personal list settings, like wrapping and row size
- How to reset your list back to the default
1 Make the list yours
Everyone needs different columns. Riya wants to see Caller and Priority. Sam wants Location and Updated. With list personalization, each person picks their own columns. 🎛️
This is the “personalize” level from Lesson 9.1: it changes the list for you only.
2 Personalize your columns
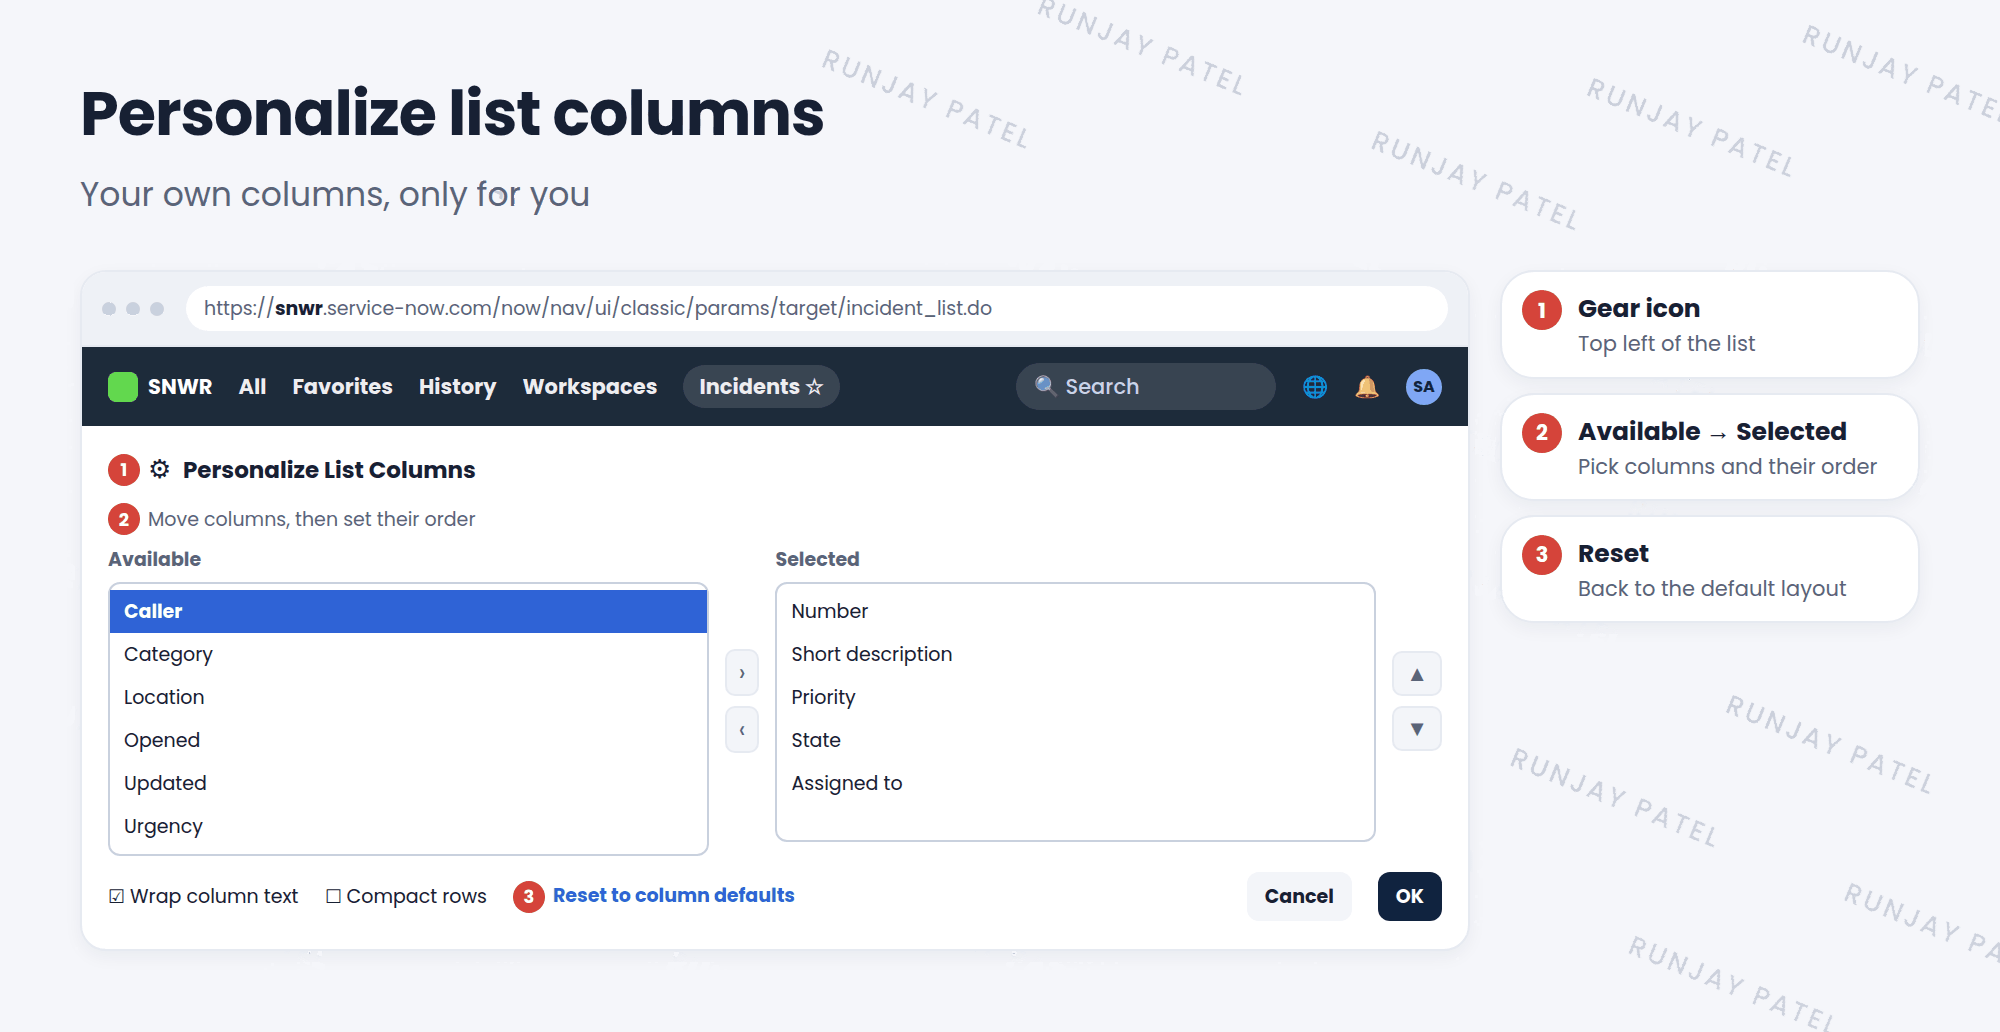
- Open a list, like Incident > All.
- Click the gear icon ⚙️ at the top left of the list, above the checkboxes.
- In Available, pick a column and move it to Selected with the arrow.
- Use the up and down arrows to change the order.
- Click OK. Your list shows your columns now.
⭐ Remember: Personalizing changes the list only for you. Your teammates still see their own layout, or the default.
3 More personal settings
| Setting | What it does |
|---|---|
| Wrap column text | Long text wraps onto more lines instead of being cut off |
| Compact rows | Makes rows shorter, so more fit on the screen |
| Reset to column defaults | Throws away your changes and goes back to the default layout |
💡 Good to know: A user says “my list looks different from everyone else’s”? They probably personalized it. Ask them to click the gear and choose Reset to column defaults.
📝 Note: Admins can turn off personalization for a list, so everyone sees the same columns. You’ll see that in Lesson 12.3.
4 Let’s try it: your perfect list
- Open Incident > All. Click the gear icon.
- Add Caller and Updated. Remove one column you don’t need.
- Move Priority up so it’s right after Number. Click OK.
- Impersonate Riya and open the same list. Does she see your columns? (No! They’re just yours.)
- End impersonation. Click the gear and choose Reset to column defaults.
5 Quick recap
- The gear icon on a list opens Personalize List Columns
- Move columns between Available and Selected, and set the order
- Changes affect only you
- Reset to column defaults brings back the normal layout
6 Check yourself
Think of your answer first. Then tap to check.
1 Which icon opens list personalization? Show answer
The gear icon at the top left of the list.
2 You add a Location column to your list. Does your team see it? Show answer
No. Personalization only changes your own list.
3 How do you undo your personal list changes? Show answer
Click the gear icon and choose Reset to column defaults.
Nice work! You finished this lesson. 🎉
Was this lesson helpful?
Please log in to share lesson feedback.
Have a question or doubt?
Ask here and get help from instructors and fellow learners.
Only logged-in learners can post.