
Form Layout
On this page
In this lesson, you will learn:
- How admins choose which fields appear on a form
- How to use the Form Layout tool
- How to add a section and even create a new field
1 Changing the form for everyone
In Chapter 13, you learned the parts of a form. Now, as an admin, you’ll change them. Changing which fields show on a form is called configuring the form layout. It’s the “configure” level from Lesson 9.1, so it’s safe for upgrades. 👍
There are two tools for this: Form Layout (this lesson) and Form Designer (Lesson 14.2). Both change the same thing.
2 Open Form Layout
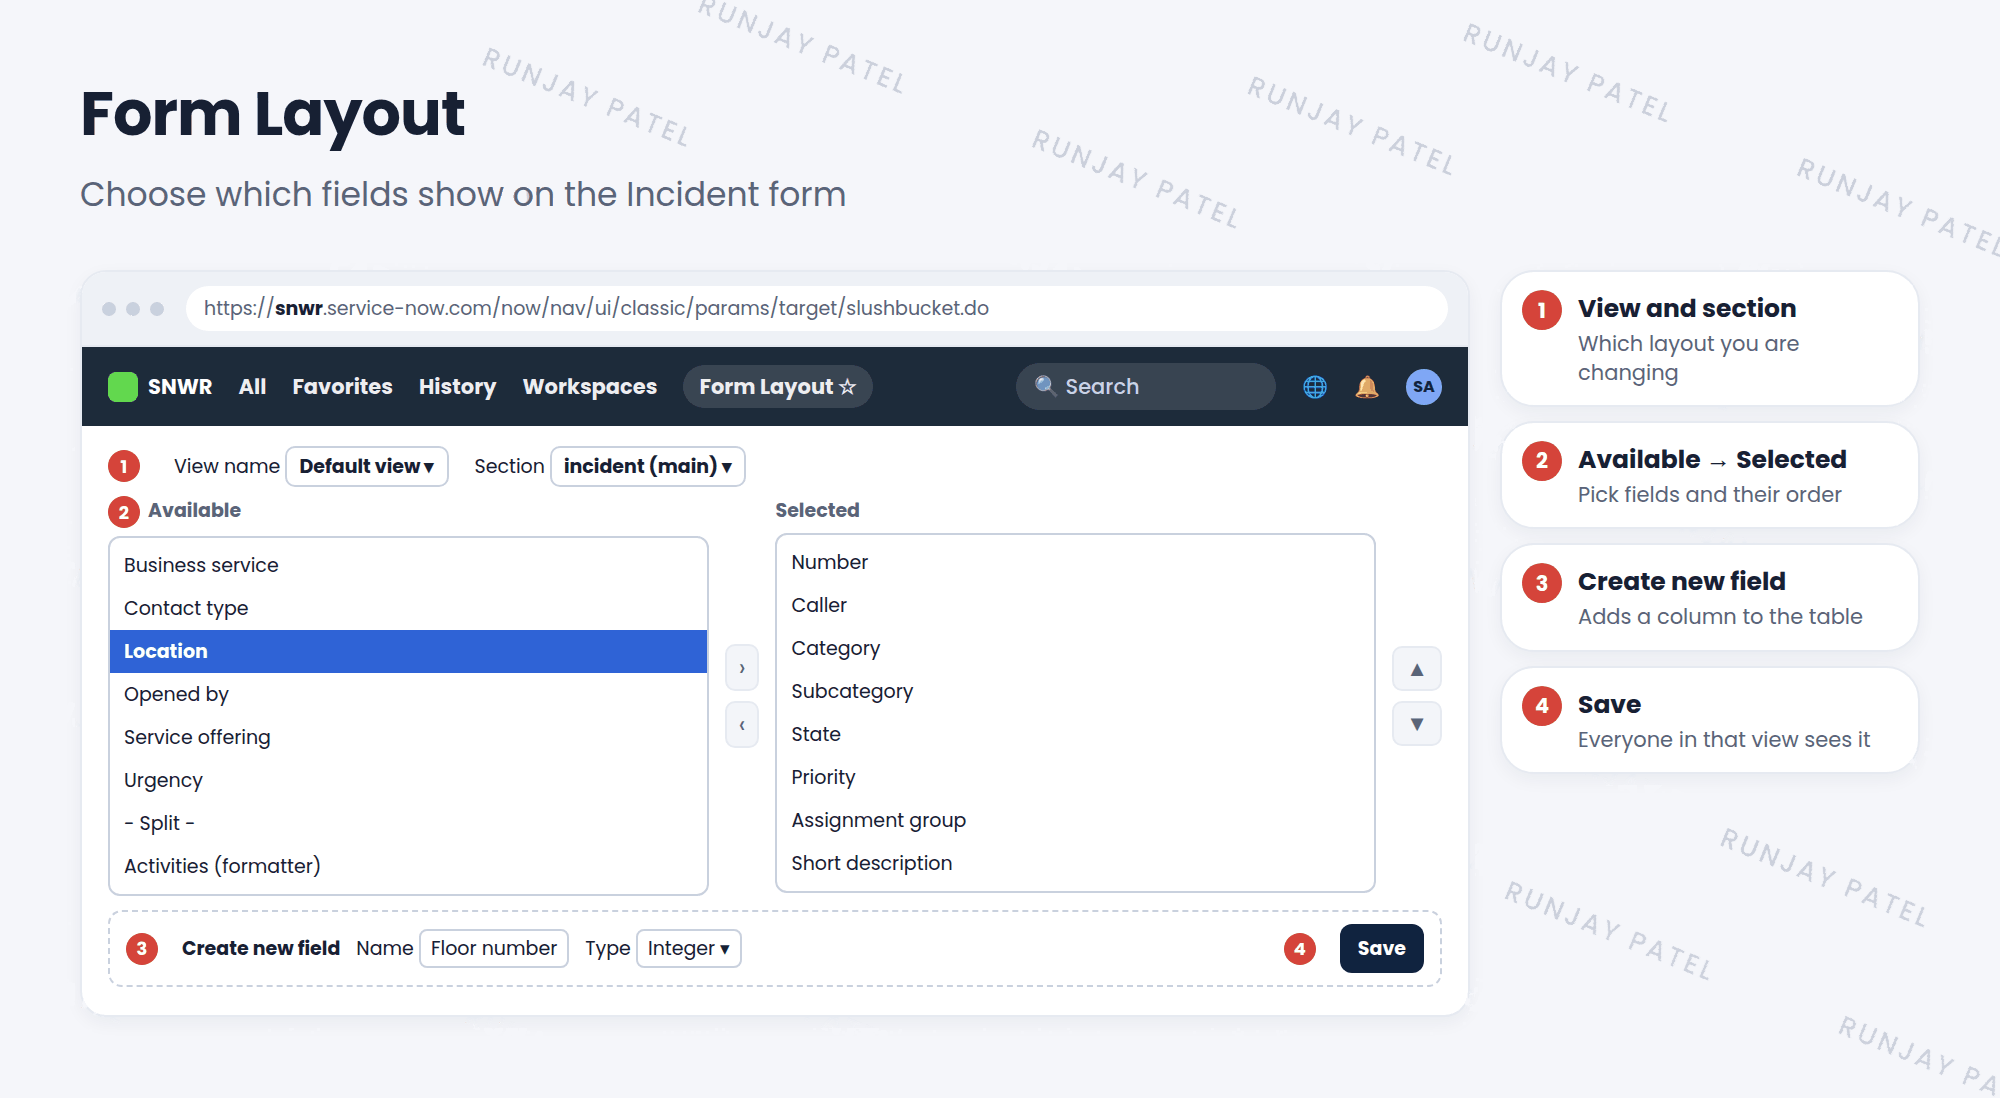
- Open any incident.
- Open the form’s context menu (☰) and choose Configure > Form Layout.
- Check the View name (usually Default view) and pick the Section you want to change.
- Move fields from Available to Selected, or back.
- Use the up and down arrows to set the order.
- Click Save. Everyone using that view now sees the new layout. ✅
📝 Note: Removing a field from the form doesn’t delete it or its data. The field still exists in the table. It’s just hidden from this form.
3 Other things Form Layout can do
- Add a section: use the Section picker and choose to create a new one. Give it a name, then add fields to it.
- Add formatters and splits: items like the activity formatter and column splits appear in the Available list too.
- Create a new field: at the bottom, type a name, pick a type, and add it. The field is created in the table and placed on the form.
⚠️ Heads up: Creating a field adds a new column to the table. Plan the name and type carefully. You’ll learn much more about creating fields in Chapter 32 (Advanced track).
⭐ Remember: Form Layout changes the form for everyone using that view. Try changes in sub-production first.
4 Let’s try it: add a field
- Open any incident. Choose ☰ > Configure > Form Layout.
- Find Location in Available and move it to Selected, right after Caller.
- Click Save. Does Location now show on the incident form?
- Open Form Layout again and move Location back to Available. Save. Good admins clean up! 🧹
5 Quick recap
- Open Configure > Form Layout from the form’s context menu
- Move fields between Available and Selected, and set their order
- You can add sections, formatters, and even new fields
- Removing a field from the form doesn’t delete its data
- Changes affect everyone using that view
6 Check yourself
Think of your answer first. Then tap to check.
1 Where do you find Form Layout? Show answer
In the form’s context menu, under Configure > Form Layout.
2 You remove the Location field from the form. Is its data deleted? Show answer
No. The field and its data stay in the table. It’s only hidden from the form.
3 Is changing the form layout “configuring” or “customizing”? Show answer
Configuring.
Nice work! You finished this lesson. 🎉
Was this lesson helpful?
Please log in to share lesson feedback.
Have a question or doubt?
Ask here and get help from instructors and fellow learners.
Only logged-in learners can post.